Tips for DIY Computer Repair
Troubleshooting and repairing a computer can be intimidating, especially for those with little to no technical knowledge. But with the right guidance and information, it can be a relatively straightforward process. This guide will review the basics of DIY computer repair and provide tips to help anyone tackle their own computer issues, without needing to contact a professional.
This guide will provide readers with an in-depth look into the components of a computer, as well as how to effectively troubleshoot common hardware and software issues. It will also discuss how to properly clean the hardware components of a PC, how to update both the hardware and software components of a PC, and safety guidelines to take when doing a DIY repair. In addition, it will provide steps to take if you cannot figure out an issue and need to contact a professional, as well as resources to provide additional information.
By following the tips outlined in this article, you will gain the knowledge needed to diagnose and repair your own computer. So let’s get started and dive into the world of DIY computer repair!
Understanding the Basics of PC Components
Knowing how your computer works and understanding its components is key to doing DIY computer repairs. Whether you’re dealing with hardware or software issues, understanding what makes up a computer is your first step. PCs, or personal computers, are made up of several components that work together to achieve a task.
A fundamental component of all computers is the motherboard. This is where all of the other components connect to the system. It consists of a printed circuit board (PCB) along with several chips and sockets for mounting components such as RAM, CPU, GPU, hard drive, and sound card.
Another important component is the Central Processing Unit (CPU). This is the brains of the computer as it handles all of the data processing tasks. The speed of the CPU plays an important role when it comes to overall system performance.
The Graphics Processing Unit (GPU) is responsible for handling all of the graphical output on the computer. This includes displaying images on your monitor and rendering videos. GPUs are often dedicated cards that plug into the motherboard or built-in as part of the chipset.
Random Access Memory (RAM) stores data temporarily as it works with the CPU to execute instructions and processes. It is the main reason why PCs can multitask and switch between different applications quickly.
The storage of a computer is handled by the Hard Disk Drive (HDD) or Solid State Drive (SSD). The HDD or SSD stores all of the files and data on your computer so you can access them at any time.
Finally, the Power Supply Unit (PSU) provides the power to the entire system. Depending on the type of PC, the PSU can be either integrated into the case or a separate component that needs to be plugged in.
By understanding the fundamentals of computer components, you are now ready to move on to troubleshooting the issues with your PC.
Troubleshooting Common Issues
When it comes to fixing your own computer, the most important thing to remember is to be prepared for when things go wrong. There are many common issues that can arise with a computer from time to time, and troubleshooting and resolving these issues can sometimes be difficult. By understanding how to troubleshoot these types of problems, you can save yourself time, energy, and money.
In general, common issues with PCs include hardware-related issues, such as a non-working power supply or defective parts, as well as software-related issues, such as failing or incorrect drivers, missing system updates, and even virus or malware infections. It is important to be able to identify the problem and take the necessary steps to fix it.
One way to troubleshoot is to use a process of elimination. By narrowing down the issue to one or two possible causes, you can then focus on the likely cause and take the necessary action to fix it. For example, if your computer will not turn on, start by checking the power cable, as this can often be the reason why the machine won’t boot up. If the power cable is fine, then the next steps might involve trying a different power outlet, or checking the internal components of the machine.
If the issue appears to be more related to software, then you can use the built-in troubleshooting tools in your operating system to help you resolve the issue. For Windows, the troubleshooting tool can be found in the Control Panel under the ‘System and Security’ section. From here, you can quickly diagnose and repair any number of common software issues.
It is also advisable to research any issue that you come across online. This will allow you to get further insights into the problem and potentially find an effective solution. You should also try using an antivirus program to scan your computer for any malicious items. This can prevent future issues from arising.
By following these steps and being mindful of common issues, you can become an expert at troubleshooting computer issues and save yourself a lot of time, effort, and money in the long run.
Developing a System Backup and Restore Plan
Do-it-yourself computer repair can be intimidating, but it doesn’t have to be. One of the most important things that you can do as part of your DIY computer repair is to create a systematic backup and restore plan. This will help in case there are any hard drive issues.
The best way to back up your system is to use an external hard drive. Using an external hard drive ensures that if any of your files are lost or corrupted, you can easily restore them from the external hard drive. It’s important to store a copy of your files offsite, such as in a cloud storage service, as well. This ensures that if anything happens to your computer, you still have access to all of your important files.
Once you have backed up all of your files, you should create a restore point. This allows you to quickly restore your computer to its original state if something goes wrong. After creating a restore point, you should test it to make sure that it is working properly. You can do this by intentionally disrupting the system and then restoring it using the restore point.
Finally, you should create a schedule for regularly backing up your system. This can be done manually or using automated software. It’s important to stick to the schedule so that your data is always safe and secure.
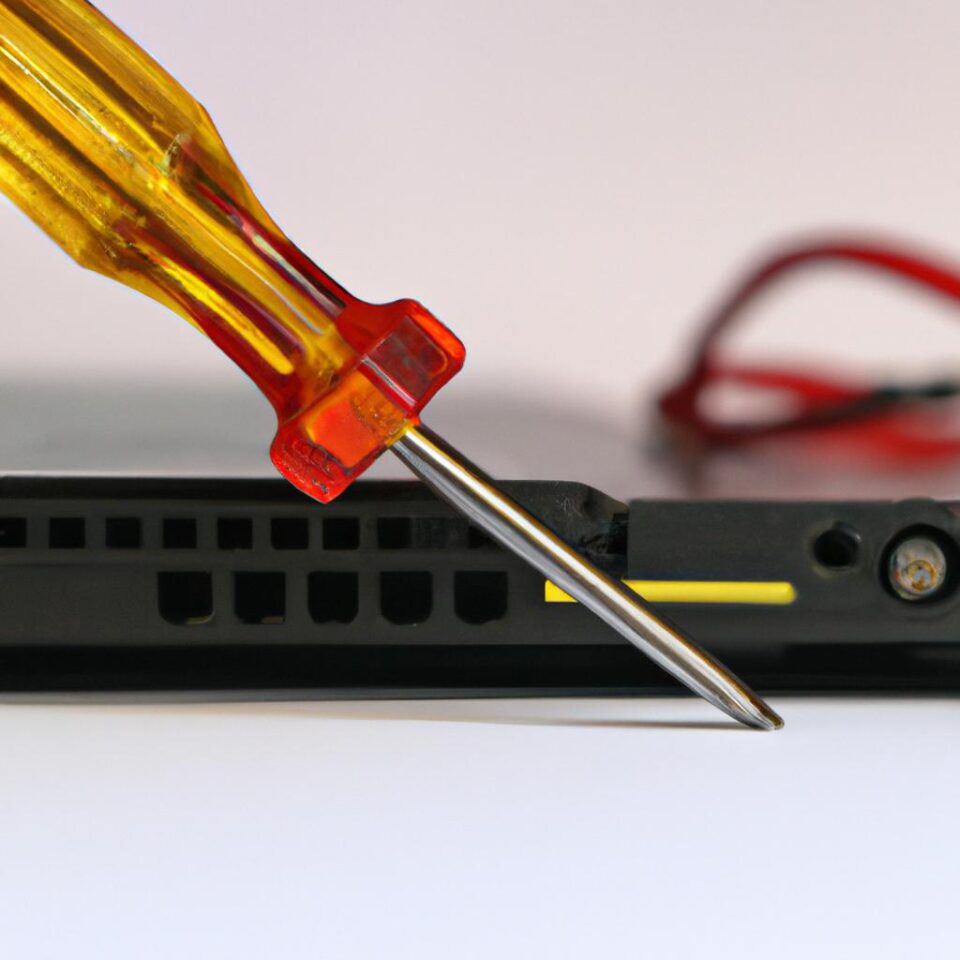
Tips for Cleaning the Hardware Components of a PC
When it comes to repairing and maintaining a computer, cleaning the components is an important step in keeping it running smoothly. While it isn’t necessary to clean out a computer every time you tinker with it, it’s still a good idea to perform a basic cleaning periodically. Here are some tips to help you keep your computer’s hardware components clean and operational.
- Gather Your Supplies: Before you begin cleaning the hardware components of your PC, it’s important to have the correct supplies. You will need cotton swabs, cotton balls, compressed air, a can of electronics-safe cleaning fluid, and cleaning cloth. You may also want to wear latex gloves to prevent potentially hazardous substances from entering your skin.
- Start with the Exterior: Begin by using a cloth and cleaning fluid to wipe down and clean the exterior of your PC. Be sure to pay special attention to the fans, vents, and other openings. Be sure to avoid getting moisture near or in the PC.
- Dust Out the Interior: Once the outside is clean, use the compressed air to blow out all the dust and debris that has accumulated inside the computer. This can help prevent overheating issues. Be sure to point the can away from the motherboard and other components to avoid damage.
- Clean Fans: After dusting out the interior, use the cotton swabs and cleaning fluid to carefully wipe down the internal fans. Dust can accumulate on the fan blades and impede performance, so it’s important to make sure the fans are free of debris.
- Clean Other Components: You can then use the cotton swabs and cleaning fluid to clean any other components you may need to replace. This includes RAM modules, processor heat sink, and graphics cards.
- Finishing Touches: Once everything has been cleaned, reinstall the components. Replace any casing you may have removed before to complete the process.
Cleaning the hardware components of a PC is essential for proper functioning and maintaining its overall health. Being aware of the supplies you need and following these simple tips can help extend the life of your computer and keep it running optimally.
Procedures for Diagnosing Different Hardware Problems
Computer hardware problems are some of the most common issues that users face. Thankfully, diagnosing and resolving hardware issues can be done with simple procedures. Before getting into the nitty-gritty details, let’s first go over some basic principles every user should know when trying to diagnose a hardware problem.
Check the Manual
The best place to start when trying to figure out an issue is usually in the manual that came with your computer, as it provides some helpful information on how to diagnose common hardware problems. The manual can often direct you to specific schematics and diagrams that could identify potential causes of the issue you’re having.
Check Your Cables and Power Supplies
If all else fails, one easy solution to try is simply checking your cables and power supplies. Ensure that all of your cables are properly connected and that your power supplies are securely in place. If any of your connections are loose, try plugging them in again and see if your problem is resolved.
Use Testing Hardware
In more serious cases, you may need to use testing hardware. These tools allow you to test different components of a computer and make sure they are functioning properly. Some of the most common testing hardware used for computer diagnosis include the motherboard, RAM sticks, power supplies, and cooling systems.
- Motherboard – This is the central component of the PC that connects all other hardware together.
- RAM Sticks – Random Access Memory (RAM) is important for running applications and playing games.
- Power Supplies – These ensure that each component of your computer receives the appropriate voltage.
- Cooling Systems – Heat is one of the biggest enemies of computer hardware, so having an effective cooling system is key.
Once you have identified the cause of the issue, you can begin to take the steps needed to correct the problem. With the right knowledge and a bit of patience, you can successfully diagnose and fix most hardware problems.
Advanced Troubleshooting
DIY computer repair can get tricky at times and you may find yourself stuck with no clue on how to resolve the issue. Before you panic or throw in the towel, focus on understanding the problem and doing some advanced troubleshooting. Here are some techniques for advanced troubleshooting:
- Start by breaking down the problem into smaller pieces and analyzing each one separately. This helps narrow down the search area and make troubleshooting easier.
- Look up the error message you’re getting in an online search to see what the issue might be. People often upload solutions to other people’s problems so you may find the answer quickly.
- Check system logs that may have useful information on what is causing an issue. Logs provide detailed information that is essential for solving complex problems.
- When all else fails, it’s time to look into replacing the hardware component or installing new software. Replacing a malfunctioning part can save you time in the long run.
Advanced troubleshooting takes time and patience, but the reward of resolving the problem yourself is worth it in the end. Remember to do online research to acquaint yourself with the basics of computer troubleshooting before attempting any repairs.
Updating Both Hardware and Software Components of a PC
It’s important that you keep your hardware and software components up to date. This includes any operating system updates, drivers, firmware, etc. It can be difficult to keep everything current, but having the most recent updates is necessary to ensure your computer runs optimally and efficiently.
When updating either type of component, begin by looking through the manufacturers’ website to find if any new updates are available. Many times, you will find direct download links for any updated files that you may need. In other cases, manufacturer websites will provide instructions on how to update their respective hardware or software components.
Another way to update hardware and software components is to use third-party applications such as Windows Update. Windows Update will regularly scan your computer for any outdated components and prompt you to download and install the latest versions.
It’s also important to remember that when it comes to updating both hardware and software components, it’s best to follow the manufacturer’s instructions to ensure that the process runs smoothly. If you have any doubts or questions about the updates, contact the customer service department of the respective manufacturer.
Safety Guidelines
Before attempting any DIY computer repairs, safety should be your top priority. Read through the manual for your device before attempting any repair. Be sure to properly disconnect all wires and cables and keep them away from water sources. Wear anti-static gloves and wrist straps to prevent static electricity shocks. Turn off the power before opening the system.
Unplug all external devices, such as printers, scanners, and monitors. Before making any repairs or changes inside the computer, make sure that all of the screws are in place. Use only the recommended replacement parts, this is particularly important for laptops. Always use correct tools, and always be aware of the potential danger, in particular when dealing with hardware components.
Steps to Take when You Need Professional Assistance
Working on a computer can be intimidating for some, especially if you are not sure what you are doing. If you find yourself in a situation where you can’t figure out an issue with your computer, it may be time to reach out and contact a professional. But before you do that there are steps that you can take to help diagnose the issue.
The first step is to make sure that all of your hardware components are securely plugged in and correctly seated. This includes ensuring that everything from the power cable, to the CPU and RAM is secure. If the problem persists, then it’s likely something within the software realm, and you should try rebooting the computer multiple times to reset any settings which may be causing the issue.
Another thing you can check is the old trusty internet connection. This is especially true if your issue has to do with a piece of software that relies on the internet. If none of these solutions have worked or you feel like you’ve exhausted every possible solution, then it is best to contact a professional.
When reaching out to an IT professional, make sure you provide as much detail as possible about your issue. That way, they’ll have a better understanding of the problem and be better prepared to help you. Also, depending on the severity of the issue, you may need to send a technician on-site to investigate the problem further.
In any case, seeking professional assistance when things get complicated is always the best route to take. This way you can rest assured that your problem will be addressed promptly and correctly. Seek out technicians that have experience servicing similar issues and have made their customers happy.
Conclusion
DIY computer repair can seem intimidating at first, but with a bit of patience and the right information, you can save yourself time and money by fixing issues yourself. In this guide, we have provided an introduction to understanding the components of a computer, tips for troubleshooting hardware and software issues, strategies for proper cleaning of the hardware components, instructions for advanced troubleshooting of more complex problems, and steps to update both hardware and software components correctly.
We also provided safety guidelines and preventative measures to follow when doing DIY repairs, as well as steps to take if you can’t figure out an issue and need to contact an IT professional. Finally, we provided resources with additional information that may be helpful when doing DIY computer repairs.
We hope this guide has given you the knowledge and confidence to do your own PC repairs. We recommend getting a reliable system backup plan in place so that you can always restore your data back to a working condition. Always keep up to date on the latest system updates and follow the safety tips and preventative measures outlined in this guide to ensure a successful repair.
Resources for DIY Computer Repair
When attempting to repair your computer yourself, it is important to have the right resources available. Doing some research into the issue you are facing can help you save time, and assist you in quickly diagnosing any issues.
One excellent resource is online forums where people discuss computer repair. Here, you can find out what others have experienced when they ran into the same issue as you. Equally important is searching for how-to videos on YouTube, which are often made by IT professionals and can be very helpful. Additionally, if you are having trouble understanding some of the technical language used in forums or videos, consider using an online dictionary such as TechTerms.
For more specific issues, there are also a number of books and websites with detailed instructions on computer repair. Popular resources include websites like PC World and books such as “The Complete Guide to PC Repair”. These resources can be great for breaking down complex repairs into easy to understand steps.
Finally, checking out the manufacturer’s website can provide you with updates and patch packages that may solve your problem. Make sure you always stay up to date with the latest driver and software updates for both your operating system and hardware components.
comments: 0
